

All artists will work differently but following is the process is the one I usually use in designing my linoprints.
Basically the process that I use in designing new linoprints involves a lot of pre-designing ‘thinking’. I take all my own source photos so the first step involves taking many photos of the subject in all its different aspects. With a busy life I have little time to spend ‘on-site’ and usually I have family following or waiting nearby. (“Are you finished yet mum?”)
In the past ‘pre-digital’ times all this photography has meant lots of money on film processing and printing (I have a rather large collection of filed photographs) but with digital I have the luxury of saving the images to disk and printing as I need them.
The next step is the ‘thinking’ and looking at the images I could possibly use – doing some small sketches of individual plants. I sometimes grow specific plants or buy them to work from also. I then may do a series of small quick and usually ‘scrappy’ sketches of compositional ideas with written notes…

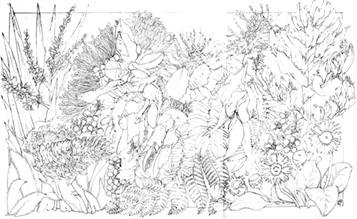
I then set about translating these ideas into a design – as with in the case of the NZ Wildflower design – I look at a selection of possible wildflowers/plants I could use and lightly sketch these up into the basic format/design layout. I then make a detailed drawing of the design. In this process the overall design layout and which wildflowers/plants I end up using may completely change or change position. I’ll assess not only what I consider the importance of each flower/foliage within the overall design concept but also their individual shape, size and colour and their effects on the overall design.
The final drawn design for the NZ Wildflower design looks like this…
I’ll spend some more time thinking… adjusting… and assessing… the overall concept and drawing….
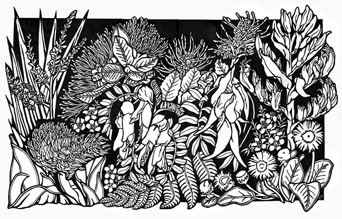
I then photocopy this pencil drawing – at this point I may also change the overall size (larger or smaller) – again this is part of the overall processing and thinking about the development of the final design. I then ink in the black areas of the design on the photocopy. I use this process for a number of reasons – it gives me time to think about the overall design and make adjustments as I go but mostly it means I have a black and white ‘template’ to use to carve the lino. I notoriously used to cut the wrong areas – particularly with the more intricate work and I now find that I rarely have this problem. So the final design phase ends up looking like this…..
Then more thinking… changing… and assessing…I’ll ‘live’ with this design for a while….
Finally I’ll transfer my final design image in reverse onto the lino and start carving.
